Arrow Spine Tester
The measurement page: how the 26-inch / 1.94-pound AMO test actually works, which commercial tester fits your bench, a DIY rig for under $25, and how to index and spin-test a dozen into matched arrows. The chart-and-formula side of spine lives on the Spine Calculator.
Tester Setup Configurator
DIY Two-Point Rig (Two support blocks (razor-straight edges) 26″ apart on a bench)
Two support blocks (razor-straight edges) 26″ apart on a bench, a cord hanger, and a hanging 1.94 lb weight — total parts under $20 if you already own a tape and a level.
- 1Set the two support edges exactly 26 inches apart, level and square
- 2Lay the arrow across the supports with the nock just past one edge (68% span rule: 26″ between points)
- 3Hang the weight at the exact center of the span with a cord loop
- 4Let the shaft settle 5 seconds, then read the sag at center with a rule or dial indicator
- 5Convert the reading: sag in thousandths of an inch = spine number (0.500″ = 500)
- 6Test 3 shafts and compare: matched arrows should read within ±0.010″ of each other
Verdict: Perfect for identifying an unmarked shaft or confirming a spine range before you buy more.
How to Measure Arrow Spine: The AMO/ASTM 26″ × 1.94 lb Test
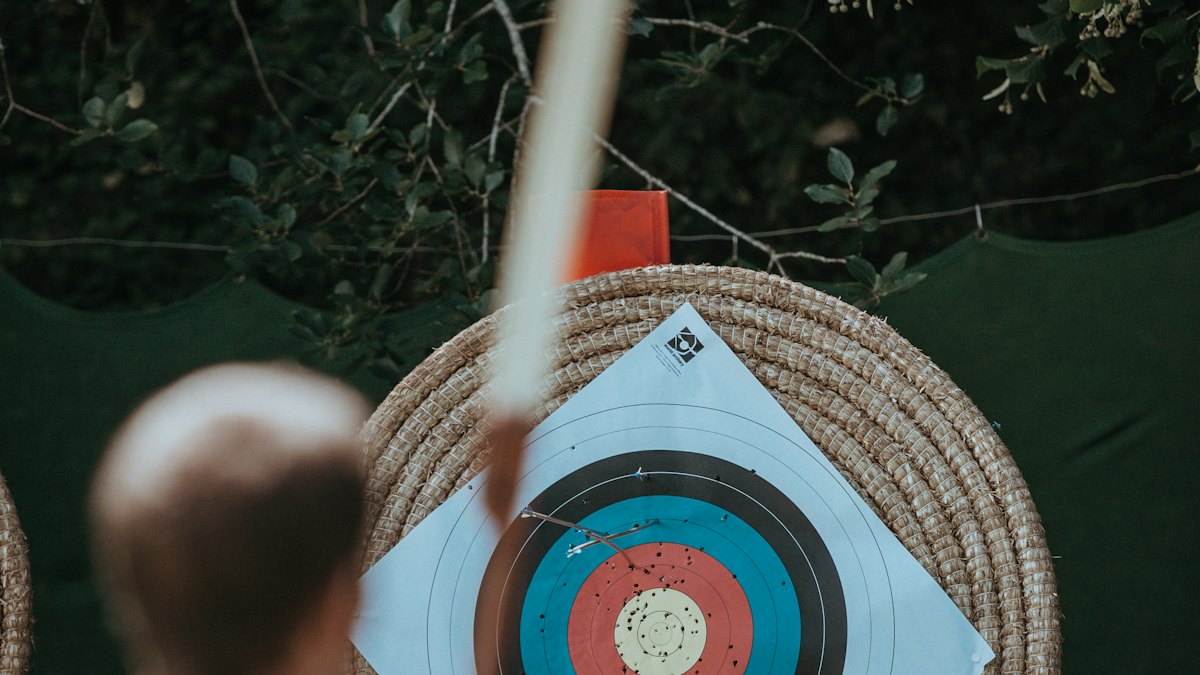
Every spine number on every arrow box on earth comes from one measurement: the shaft is supported on two points exactly 26 inches apart, a 1.94-pound (880 g) weight is hung at the center, and the sag is read in thousandths of an inch. That sag number is printed on the shaft as its spine. A shaft that sags 0.340 inches is sold as a 340; a 0.500-inch sag is a 500. Lower number = stiffer shaft. No formula, no brand conversion table — the deflection reading and the spine number are the same measurement.
Set the 26-inch span
2 minTwo sharp, level support edges exactly 26″ apart. This is the ASTM/AMO standard span — a 25″ or 27″ span shifts the reading by roughly a full grade.
Hang the 1.94 lb load
1 minExactly 1.94 lb — 880 grams — hung from dead center. The 'spine tester weight' is arbitrary but standardized; using a 2 lb dumbbell instead skews every reading about 3%.
Seat the arrow
1 minShaft across both edges, centered, nock overhang ignored. For wood shafts, note grain orientation and test both axes.
Read center sag
2 minLet it settle 5 seconds, then measure how far the center dropped in thousandths of an inch. A dial gauge is faster; a steel rule works for DIY.
Convert to spine
1 minThe reading IS the spine: 0.340″ sag = 340 spine. A 0.400″ sag means a weaker (more flexible) shaft. Log it and move to the next arrow.
💡 The 1.94 lb mystery, solved: the number is pure convention — inherited from the original AMO standard and kept by ASTM F2031 so every brand's “340” means the same physical bend. What matters is that you use exactly 1.94 lb (880 g): a 2-lb dumbbell over-reads flexibility by ~3%, turning a true 340 into a fake 350.
Commercial Spine Testers Compared: RAM, Arrow Inspector & Digital
Four tools dominate home and pro-shop benches. The mechanical dial gauge remains the best value; digital units win only when you need tournament-grade dozen sorting.
| Tester | Method | Price | Accuracy | Best for | Verdict |
|---|---|---|---|---|---|
| RAM Arrow Spine Tester | Mechanical dial gauge, 1.94 lb cam | $95–140 | ±0.005″ | Pro shops & traditional shooters — the decades-standard workhorse | ✓ Winner |
| Arrow Inspector (spin + spine combo) | Roller cradle: spine gauge + straightness spin check | $70–110 | ±0.008″ spine / straightness visual | Home tuners who also want spin-testing in one bench tool | ✓ Winner |
| Digital spine tester (load cell) | Load cell + LCD, auto spine conversion | $220–450 | ±0.001–0.002″ | Tournament builders, dozen sorting to 0.004″ | Solid |
| DIY two-point rig + hanging weight | 26″ span, hanging 1.94 lb mass, rule readout | $15–25 | ±0.015″ | One-off shaft ID and budget builds | Solid |
⚠️ Buying note: “spine tester for sale” listings that omit the load weight are usually deflection gauges only — they measure sag but leave the 1.94 lb mass to you. Confirm the listing includes the calibrated weight or plan to hang your own 880 g jug.
DIY Arrow Spine Tester: Two Builds Under $25
A spine tester is just a span, a weight, and a ruler. Both builds below hit the AMO standard within half a grade — enough to ID unmarked shafts, check a shop's grading, and (with patience) sort a dozen into stiff and weak halves.
Build 1 — The Two-Block Bench Rig
- Two hardwood blocks, each with one razor-straight edge, sanded smooth
- Screw them to a board 26 inches apart, edges level (verify with a spirit level)
- Cord loop + 880 g water jug as the center weight (1.94 lb)
- Steel rule or yardstick marked in 1/64″ to read center sag
- Reading: sag in thousandths of an inch = spine (3/8″ ≈ 0.375″ ≈ 375 spine)
Build 2 — The Sawhorse & Bucket (wood arrows)
- Two sawhorse edges set 26 inches apart, padded with leather scraps
- Hang a bucket; fill to 890 g (the traditional 2 lb wood-shaft load)
- Test each cedar shaft on both grain axes — record the stiff one
- Weigh each shaft too: match spine and weight (±2 gr) for a true matched dozen
- Crown the stiffest axis toward the riser when you assemble
Deflection-to-Spine Conversion Chart
Read your tester, find the sag, and you have the spine — plus the draw-weight class it usually serves.
| Measured sag | Spine number | Shaft class | Typical use |
|---|---|---|---|
| 0.700″ | 700 | Youth & light recurve | Under 30 lb recurves, youth compounds |
| 0.600″ | 600 | Light recurve / longbow | 30–40 lb traditional bows |
| 0.500″ | 500 | Recurve hunting standard | 40–50 lb recurves, 45–50 lb compounds |
| 0.400″ | 400 | Midweight compound | 50–64 lb compounds, 55 lb recurves with 100 gr points |
| 0.340″ | 340 | Hunting compound standard | 65–70 lb compounds — the most-sold grade in America |
| 0.300″ | 300 | Heavy hunting compound | 70–80 lb compounds, high-FOC builds with 150+ gr heads |
| 0.250″ | 250 | Extreme weight / crossbow | 80+ lb compounds, outsert builds, crossbow bolts |
| 0.200″ | 200 | Moose-buster / crossbow | 90+ lb, 650+ grain moose and dangerous-game builds |
Measured between the printed grades (say your shaft sags 0.365″)? You have a shaft between 340 and 400 — see how to decide between adjacent grades on the Arrow Spine Comparison page, or what bow the heavy grades serve on the 300 Spine Arrows buyer's guide.
Spine Indexing: Sorting & Aligning a Dozen
No two shafts in a factory dozen test identically — carbon layup and wood grain vary by 0.002–0.015″ even inside match-grade packaging. Spine indexing is the 20-minute bench process that turns those differences into tighter groups: (1) measure every shaft on your tester and write the number on the nock in paint pen; (2) rotate each shaft 90°, re-measure, and mark the stiffer axis — this is the axis that resists the bow's flex load; (3) sort into matched pairs within 0.005″ (a dial tester) or 0.004″ (digital); (4) install nocks with every stiff-axis mark facing the same direction, traditionally toward the bow. Pair-matched, indexed arrows are why tournament builders' practice dozens group like one arrow — the technique delivers most of the benefit of premium factory-aligned shafts using hardware-store-grade tools.
Spin Test: Checking Arrow Straightness
A spine tester reads stiffness; a spin test reads truthfulness. Steel targets and hard impacts bend shafts in ways no spine number shows — a 340 that's 0.012″ bent still tests 340 but groups like a mystery. The Arrow Inspector-style roller cradles make this a 10-second check per arrow:
Roll the arrow on a flat table
A straight shaft rolls silent and stops without a thud. A bent shaft clacks and always settles with the heavy side down — mark that spot with a pencil.
Use an Arrow Inspector or V-blocks
Spin the shaft in the cradle while watching the tip trace a circle against a fixed pointer. Deflection over 0.006″ TIR shows as a visible wobble at the tip.
Check straightness spec against the maker
Standard-grade carbon ships at ±0.006″, match-grade at ±0.003″, competition at ±0.001–0.002″. If your spin test shows more than the spec, warranty the shaft.
Spin-test AFTER every impact
Steel targets and rocks bend shafts. Ten seconds of rolling after each range session finds the bad arrow before it groups 6 inches low.
💡 Testing tip: re-test a dozen after cutting to length — cutting removes material unevenly, and the two arrows that swap stiff/weak rank post-cut are exactly the pair that would have ruined your 70-meter group.
❌ Don't chase tester decimals at the range: a 0.002″ deflection difference is invisible on any bow past 30 yards. Between 0.005″ and 0.010″ the effect is real but small; past 0.015″ — that's when you re-sort. Tune the bow first; the tester polishes. The static-to-dynamic correction math lives on the Arrow Spine Calculator.
Frequently Asked Questions
What is an arrow spine tester and how is arrow spine measured?Top Question▼
An arrow spine tester measures a shaft's stiffness by supporting it on two points 26 inches apart and hanging a 1.94-pound weight at the center — the AMO/ASTM static spine standard. The distance the shaft sags, read in thousandths of an inch, IS the spine number: a shaft that sags 0.340″ is a 340, one that sags 0.500″ is a 500. Lower numbers mean stiffer shafts. So 'how is arrow spine measured' has one answer worldwide: 26-inch span, 1.94 lb center load, deflection in thousandths of an inch. Every commercial tester — RAM-style dial gauges, Arrow Inspector combos, digital load-cell units — automates that same measurement.
How to spine test arrows with a homemade arrow spine tester?Top Question▼
Build a two-point rig: two straight-edged supports (hardwood blocks or sawhorses) exactly 26 inches apart and level, a cord loop at the arrow's midpoint, and a 1.94 lb (880 g) hanging weight — a water jug filled to 880 g works. Lay the shaft across, hang the weight at center for 5 seconds, and measure the sag with a steel rule in thousandths of an inch. Expect about ±0.015″ accuracy — roughly half a spine grade — which is plenty for identifying unmarked shafts or confirming a spine range, but not tight enough to pair-match a dozen. Details, dimensions, and the wood-shaft variation are in the DIY build section above.
What weight does an arrow spine tester use — why 1.94 pounds?Top Question▼
The standard load is exactly 1.94 pounds (880 grams) hung at the center of a 26-inch span. The figure dates to the original AMO (Archery Manufacturers Organization) test and was retained by ASTM F2031 for carbon shafts. It is not calibrated to anything physical — it is simply the agreed constant that makes every spine number comparable: 400 from one brand and 400 from another both deflect 0.400″ under 1.94 lb across 26 inches. Using a 2-pound weight instead over-reads flexibility by about 3%, which is enough to push a true 340 into a 350 reading.
What is the best arrow spine tester for home use?▼
For most home arrow builders, a mechanical dial-gauge tester (RAM-style, $95–140) is the best balance of cost and precision: ±0.005″ accuracy, direct spine-number readout, and no batteries. If you also want to check straightness, the Arrow Inspector-style combo adds a roller cradle for spin-testing in the same bench tool for around $70–110. Digital load-cell testers ($220–450) add 0.001″ resolution and target-window readouts — worthwhile for tournament builders sorting dozens to a 0.004″ band. Under $20, the DIY two-point rig identifies spine ranges within half a grade.
Is there an arrow spine tester chart that converts deflection to spine numbers?▼
Yes — and the conversion is trivial: the deflection reading in thousandths of an inch equals the spine number. 0.340″ deflection = 340 spine; 0.400″ = 400; 0.500″ = 500. The chart above lists the full ladder from 200 to 700 with the draw-weight class each grade serves. Two special cases: wood shafts are graded on the same deflection scale but sold with two-number ranges (a '55/70' cedar deflects between 0.550″ and 0.700″ depending on grain axis), and some digital testers display 'adjusted deflection' when you enter a different span — always test at the true 26″ span for chart comparability.
How do I spine index arrows — what is spine indexing?▼
Spine indexing (also called spine aligning) means finding each shaft's stiffest axis and orienting that axis the same way — usually toward the bow or toward the sight window — on every arrow. Carbon layups and wood grain are never perfectly uniform, so every shaft has a hard side and a soft side; a dial tester shows the difference as a 0.002–0.010″ deflection spread between axes. The workflow: measure each shaft, rotate 90°, measure again, mark the stiff axis on the nock with a paint pen, then install all nocks with marks aligned. Indexed arrows group measurably tighter at 40+ yards — the effect is worth roughly 3–5 yards of effective forgiveness on a tuned bow.
How do I spin test arrows — what does an arrow spin tester tell me?▼
Spin testing checks straightness, not stiffness. Roll the shaft on a flat table (a bent arrow clacks and stops with the heavy side down), or use an Arrow Inspector-style roller cradle: spin the shaft while watching the tip against a fixed point — a straight shaft traces nothing, a bent one wobbles visibly. Compare the wobble to your maker's straightness spec: ±0.006″ is standard, ±0.003″ match-grade, ±0.001–0.002″ competition. Spin-test new arrows before fletching, after every steel-target impact, and after any hard hit — a bent shaft is unfixable and will group unpredictably no matter how well it is spined.
How do I test wooden arrows — is a wood spine tester different?▼
Same 26-inch span and 1.94 lb load, but three differences matter. First, wood deflects differently along the grain versus across it: test each shaft on both axes and record the stiffest — that axis faces the bow at assembly. Second, wood is graded in ranges, not single numbers: a '55/70' shaft deflects anywhere between 0.550″ and 0.700″, which is why sorting a batch of cedar by actual measured deflection improves traditional arrows far more than any other kind. Third, weigh each shaft: matched spine matched weight (±2 grains per dozen) is what makes a wood dozen fly like matched arrows.
What is an arrow spine test kit — do I need one or just a tester?▼
A spine test kit bundles the tester with the accessories that make dozen-sorting practical: a calibrated weight set (so you can verify the 1.94 lb standard), a dial or digital indicator, V-block cradles that double for spin testing, paint pens for marking nocks, and a conversion card. You do not need a kit to test one shaft — the DIY rig answers that for $15. A kit earns its cost when you start sorting dozens, bare-shaft tuning, or building for multiple bows: the cradle and calibrated weights are what separate a repeatable measurement from a guess.
How do Victory spine-aligned arrows differ from DIY spine indexing?▼
Victory's factory spine-aligned arrows are laser-sorted so the stiff axis is factory-marked (usually with an aligned nock or logo), saving you the measure-and-rotate pass. DIY indexing does the same thing at the bench with any brand's shafts: measure deflection, rotate 90°, re-measure, mark the stiff side, orient the nocks. The accuracy is comparable when done with a dial or digital tester — the factory's advantage is speed and consistency across large batches. If you shoot standard-grade shafts, ten minutes of DIY indexing per dozen delivers most of the same grouping benefit as buying factory-aligned premium shafts.
Do spine tester readings change after cutting or adding points?▼
The tester's static reading never changes — static spine is a property of the bare shaft. What changes is dynamic spine, how the shaft behaves on your bow: cutting 1 inch stiffens the flight behavior by about half a grade, and every 50 grains of point weight weakens it by about half a grade. Pro builders exploit this: they test a dozen, cut to length, then re-test and re-sort because cutting removes material unevenly. The calculator-side of that relationship — static to dynamic corrections by draw weight, point weight, and cam type — is on the Arrow Spine Calculator; this page measures the physical shaft itself.
More Arrow Guides & Tools
How to Calculate Arrow Speed
Multi-dimensional comparison of arrow speed calculation meth...
How to Calculate Arrow FOC
Step-by-step SOP guide for arrow FOC calculation: balance po...
How to Calculate Arrow Weight
Scenario-card deconstruction of arrow weight issues: GPI dec...
How to Calculate Arrow Kinetic Energy: KE & Momentum
Decision-dashboard trade-off matrix for arrow kinetic energy...
How to Calculate Arrow Spine: Stiffness & Bow Matching
Step-by-step SOP for arrow spine calculation: static spine (...
How to Calculate Arrow Length: Draw Length & Sizing
First-principles derivation of arrow length: draw length mea...
How to Calculate Arrow Trajectory: Drop, Drag & Wind
Empirical scenario-card analysis of arrow trajectory: parabo...
High FOC Arrows: Build, Tune & Penetration (Ashby Method)
Scenario-card build guide for high FOC arrows: Ashby penetra...
Arrow Spine Comparison
Pair-by-pair adjacent spine decision guide: 300 vs 340, 340 ...
300 Spine Arrows
Heavy-shaft buyer's guide for 200/250/300 spine arrows: 65-9...
340 & 350 Spine Arrows
Buyer's guide to the 60-70 lb hunting standard: 340 vs 350 s...
400 Spine Arrows: The 55-65 lb Standard
Model-matrix buyer's guide to the 400 grade: Easton Axis, 6....
500 Spine Arrows: Recurve, Traditional & Light Compound
Step-by-step 500 spine buying guide: fit-window derivation f...
600 & 700 Spine Arrows: Light Bows, Youth & Barebow
Scenario-card guide to the light grades: 600 vs 700 spine di...
Do Arrows Spin in Flight? Arrow Rotation Physics Explained
Flight-physics explainer of arrow rotation: why bows add no ...
What Is Arrow Spine? Numbers, Ratings & Stiffness Explained
Concept pillar for arrow spine: the AMO 1.94 lb / 26 inch de...
Weak vs Stiff Arrow Spine: Symptoms, Flight Signs & Fixes
Full diagnosis manual for weak vs stiff arrow spine: symptom...
Recurve Arrow Spine: Recurve, Longbow & Horsebow Guide
Traditional-bow spine selection guide: finger-release dynami...